Showing posts with label Tombow. Show all posts

Thursday, May 19, 2016

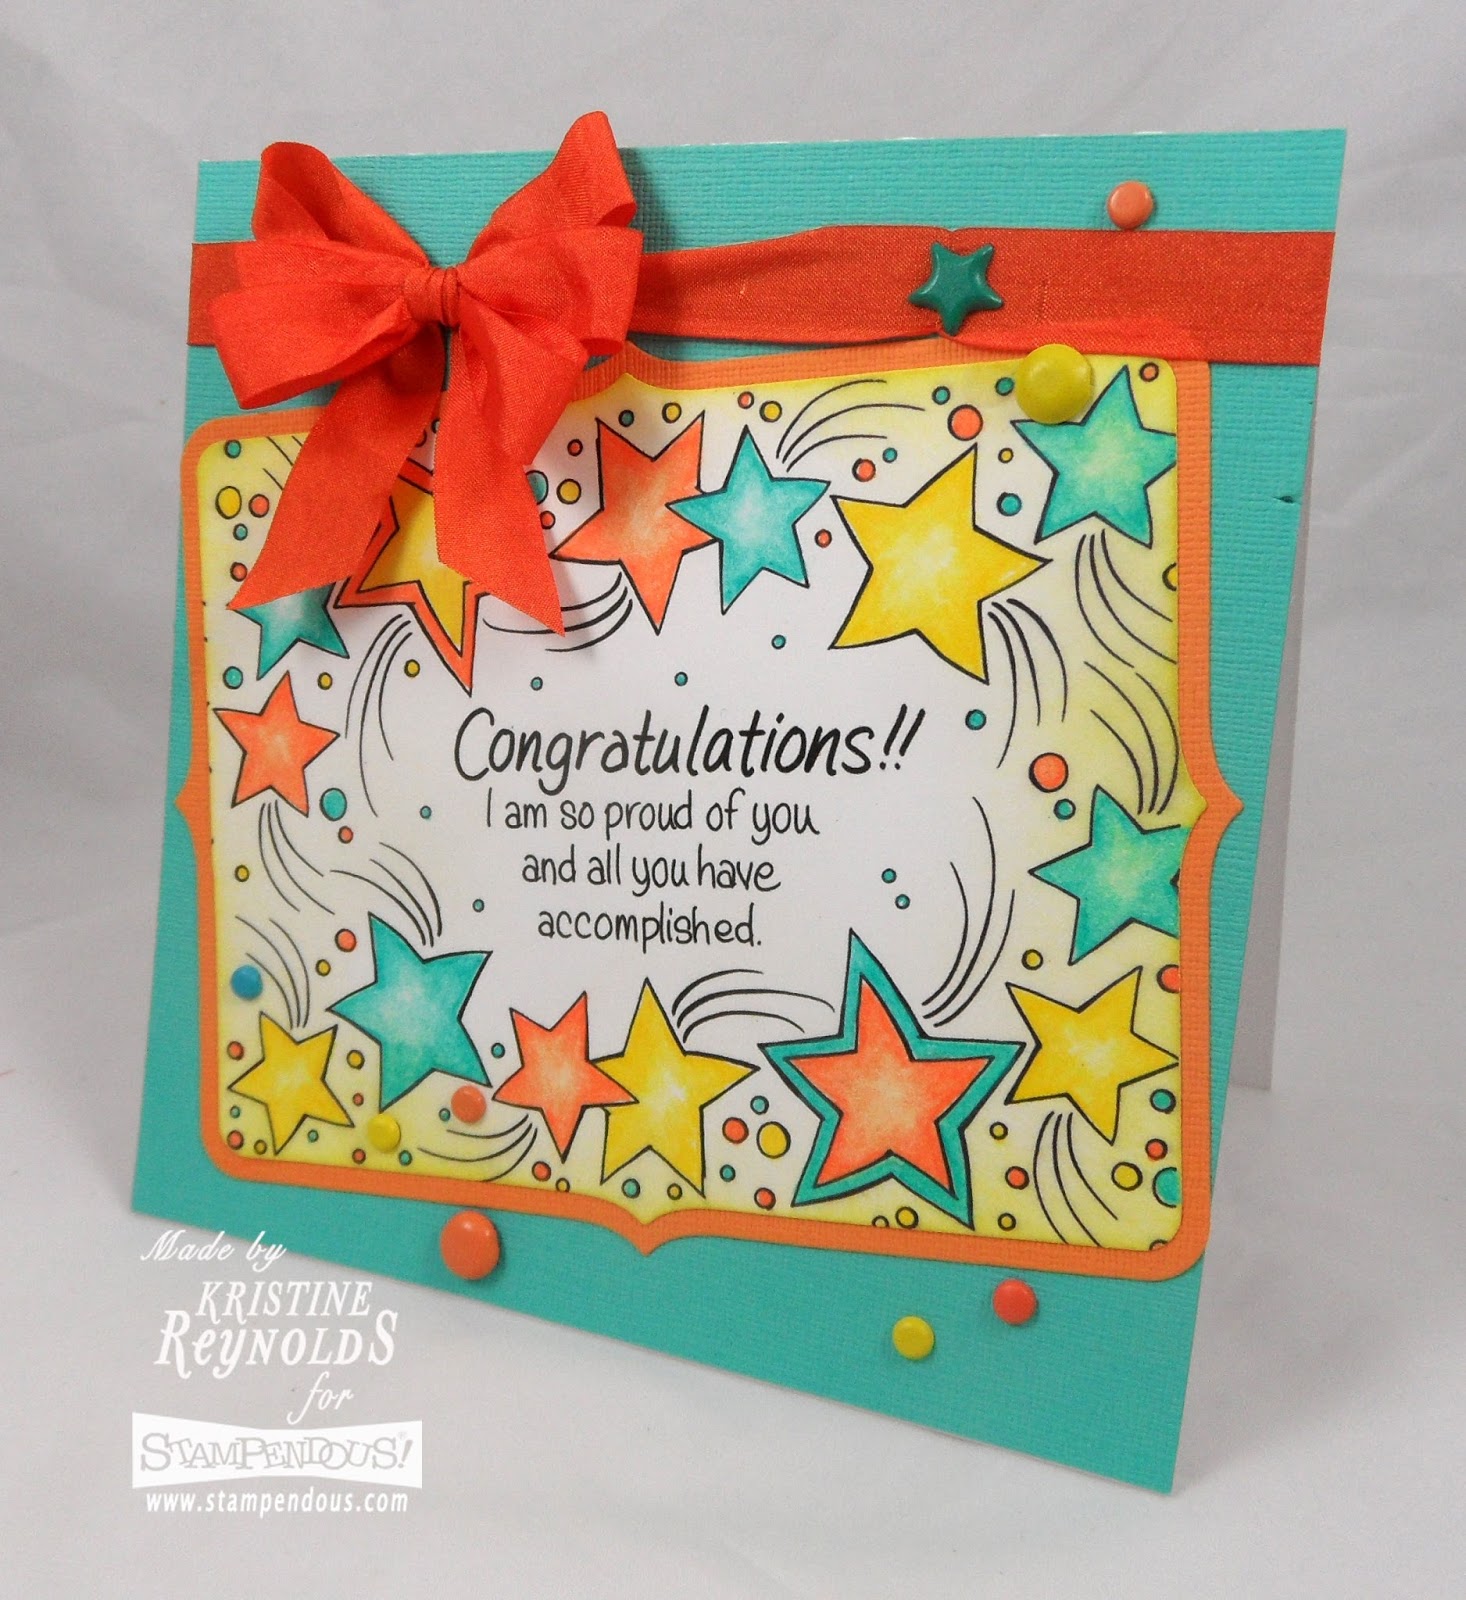
Congratulations!!

I am sharing another new image from Stampendous today.

This is an all in one stamp that has the sentiment and surrounding stars and swirls all in one!


I colored the image with my Tombow USA Recycled Pencils.


I mimiced the spots and stars in the design with some different brads from my stash!
The ribbon is from May Arts.


You can check out more samples and learn more about thee stamps on the Stampendous Blog!

Thanks for stopping by!

Kristine

Friday, February 5, 2016

I Love You

It’s a new week with an exciting new product line to highlight from the Stampendous January release! The Stencil Duo Sets designed by Fran Seiford come with complementing metal stencils, a micron pen for doodling and a set of blank cards to begin projects right out of the packaging.

The Stampendous design team will be sharing these fabulous sets with new projects all weekend long as we hop with the folks at Tombow USA where there will be more inspiring projects using them as well.
I used the Heart Duo Stencil set for today's fun gatefold card.


I started by tracing the heart shape with the heart stencil.
Then I lay the companion stencil over the heart.


I traced the design on to the heart.


To create the card base I scored an 8 1/2"  5 1/2" panel of white cardstock at 2 1/8" and at 6 3/4".


I covered the front panels with slightly smaller red panels.
I tied a piece of red ribbon (May Arts) around the left side.


Then I adhered a Tombow USA Fastener Tab on the right panel.


I adhered the left side of the heart to the left side of the card with glue.


The fastener keeps the card closed but then it's easy to open.


I added the sentiment panel to the bottom of the card.


The heart image was colored with Tombow USA recycled color pencils.


Here it is when it's opened up.


Thanks for stopping by!


Stop by the 
Stampendous Blog 
for links to the rules and the links to more fun projects!

Kristine

Thursday, February 4, 2016

Stenciling with Tombow


It’s a new week with an exciting new product line to highlight from the Stampendous January release! The Stencil Duo Sets designed by Fran Seiford come with complementing metal stencils, a micron pen for doodling and a set of blank cards to begin projects right out of the packaging.

The Stampendous design team will be sharing these fabulous sets with new projects during the week and into a weekend hop with the folks at Tombow USA where there will be more inspiring projects using them as well.
For my project today I used the Heart Duo Stencil set.


 I stenciled the patterned stencil on a panel of pink cardstock with regular embossing paste.
When it was dry I lay the heart stencil over the top and lightly sponge with grey ink.


I used my tombow glue pen to color the hearts and then covered with glitter.
This pen works great!  I've used it many times and it doesn't clog up and it is able to get into small areas.  It's perfect for applying glitter!

I used Fran's Fitted Frames dies for the sentiment

.
The ribbon is May Arts.


Thanks for stopping by!


Stop by the 
Stampendous Blog 
for links to the rules and the links to more fun projects!

Kristine

Friday, January 29, 2016

Floating by...


It's the last day of the week long hop with Stampendous and May Arts Ribbon.

I decided to made another cute House Mouse card for my final project.


This image is Umbrella Ride

I colored it with my Tombow colored pencils.


I used the Nesting Dies.


The ribbon is from May Arts but I couldn't find it in the store however....there is a wide selection of beautiful ribbons in the Ribbon Resources Store so be sure and check them all out.


Comment to win on of three prize packages that include:


See Stampendous Official Contest Rules for details.
Check out more fun projects on these blogs:


Monday, January 4, 2016

Neon Splatter


This week the Stampendous team are have fun hopping with Imagine Crafts!

Imagine crafts shared their amazing NEON stuff with the team and we have all been having fun playing!

For my card today I paired my Neon ink and Ampliy to create this Spring Card.


The image is Bear Splash from Stampendous.

I colored the image with my Tombow Recycled Pencils and added a little Amplify to the umbrella and the water drops.


For the background I stenciled the Paint Splats Stencil with Regular Embossing Paste.  When it dried I replaced the stencil back over the pattern and sponged on blue Neon ink


We have prizes! Three lucky commenters will receive a prize package that includes:
  • 1 Radiant Neon Ink Pad and Ink Refill
  • 1 Color Fragment Jar
  • a Creative Palette Rectangles Set
See Official Contest Rules for details.
Hop along and check out more fun projects!

Tuesday, December 15, 2015

Freezin' Season

Hello High Hopes Fans!

Today I have a simple card using another one of the newest images from High Hopes Stamps.


I did a lot of paper piecing with the Patterned Paper from My Minds Eye.

I colored the rest of the image with colored pencils.


I colored the image with colored pencils.
The Lace is by May Arts.
The sentiment is Freezin' Season.


You can get this adorable image and many more on the High Hopes Website


 Our challenge for December is Christmas/Winter. Are you making Christmas cards too? join us for your chance to win some High Hopes stamps. We can't wait to see your creations! 

Have you stopped by the High Hopes website to check out the new CLUB PACKS yet? each set includes 2 stamps and sentiments - Wow!  


When you purchase a club pack you Save 30% off our regular retail price. You can find the Club Packs here  on the High Hopes website. Happy Shopping!


Thanks for stopping by!

Kristine

Sunday, November 15, 2015

Family Criss Cross Card

Hello Rubber Cafe' Fans!

Kristine here today with my first card that I made with the November Kit of the Month Club from, The Rubber Cafe'.   
This month's kit called Love Makes You a Family!  

The kit includes Echo Park's 6x6 pad- The Story of Our Family by Designer Lori Whitlock, and tons of amazing ribbons and mini Distress Inks!  

For today I used the stamps from the Creative Cafe' Kit, Family Tree stamp set, and the add on set Home Sweet Home.

And my fun fold card today is a criss cross card!


To create this card I started by cutting an 8 1/2" x 11" panel of yellow cardstock in half length wise.
Then I scored both halves at 5 1/2".
I cut one corner off each of the panels as shown below.


I adhered the panels together and then adhered a panel of 4 1/8" x 5 3/8" patterned paper to the center of the card with Scrap Happy Glue.

I added a strip of Scor-Tape to the bottom of each of the side panels.


Cut across a 4" x 5 1/4" from corner to corner.


Remove the paper protecting the scor tape and fold over the right side of the card.


Repeat on the left side.


Tie ribbon around the bottom portion of the card.
Stamp image on a white die cut oval and back with a teal scallop edge oval panel before adhering to card.
Color image with colored pencils.
Create the clouds with Peacock Feather's Distress Ink.
Adhere to card front.


Create the inside panel.
The outer blue panel is 5 1/4' x 3 3/4"
The patterned paper panel is 5 1/8" x 3 5/8"
The image panel is 2 3/4" x 4 1/4"


I colored the image with colored pencils and sponged distress ink around the edges.
Then it's ready to put in the previous piece you made!


This is a fun fold card that everyone in your family would love to get.


I hope you enjoyed today's card.

Check back every day to see all the amazing projects by the rest of the team!


Supplies:
Stamps:  The Rubber Cafe'-Creative Cafe' Kit:, Love Makes You a Family-Family Tree Stamp Set and the add on set, Home Sweet Home
Paper:  The Rubber Cafe'-Creative Cafe' Kit Echo Park's 6x6 pad- The Story of Family and Bazzill Cardstock.
Ink:  Memento Tuxedo Black ink, Peacock Feathers 
Adhesives: The Rubber Cafe'-Scrap Happy Glue , Scor-Tape
Other: Prisma Colored Pencils, Scor-pal

Wednesday, November 11, 2015

Box of Owls

Today I a sharing my first card that I made with the November Kit of the Month Club from, The Rubber Cafe'.   
This month's kit called Love Makes You a Family!  

The kit includes Echo Park's 6x6 pad- The Story of Our Family by Designer Lori Whitlock, and tons of amazing ribbons and mini Distress Inks!  

For today I used the stamps from the Creative Cafe' Kit.
The Family Tree stamp set is full of adorable owls.

So....I created a Box full of Owls!


To create this card start with a 9" x 5 1/2" panel of cardstock.
Use a Scor-pal to score at 2 1/8", 4 1/4", 6 3/8" and 8 1/2".


Turn the panel a quarter turn and then score at 2 3/4" stopping before the final section.


Cut as shown in the picture below.


Fold on the score lines to create the box.


Cut patterned paper pieces.
6 pieces that are 1 7/8" x 2 1/2" and one piece that is 1 7/8" x 5 1/4"


Adhere the patterned paper pieces to the box with Scrap Happy Glue.


Cut two pieces of cardstock 3 1/8" x 2 1/4".
Score on each end at 1/2".


Fold on the score lines and add Scrap Happy Glue.


Slide the panels into the box so that the glued parts are on the side of the box.


Cut three white panels measuring 1 1/2" x 2 1/8".
Stamp the Owl Houses on two of the panels and color with colored pencils.
Sponge the edges with Antique Linen Distress ink and then adhere to the side flaps of the box with Scrap Happy Glue.

On the third panel stamp the sentiment and the leaves.
Color the leaves with a green colored pencil and sponge the edges with Peacock Feathers Distress Ink.


Stamp the owls and the branch on white cardstock with Memento Tuxedo Black ink and color with pencils.
Cut out the images.

Adhere the branch and the family of owls to the back panel with Scrap Happy Glue.
Adhere the pair of owls image to a thin strip of cardstock and adhere to the back section in the box.


Adhere one of the single owls to the front section with Scrap Happy Glue.
Adhere another owl to a thin strip of cardstock and adhere to the backside of the front panel with Scrap Happy Glue.


You can add more owls if you want...just depends how big you want the family!


Here is another look at the completed card in a box.


I hope you enjoyed today's card.

Check back every day to see all the amazing projects by the rest of the team!


Supplies:
Stamps:  The Rubber Cafe'-Creative Cafe' Kit:, Love Makes a Family-Family Tree Stamp Set.
Paper:  The Rubber Cafe'-Creative Cafe' Kit Echo Park's 6x6 pad- The Story of Family and Bazzill Cardstock.
Ink:  Memento Tuxedo Black ink, Peacock Feathers and Antique Linen Distress Ink
Adhesives: The Rubber Cafe'-Scrap Happy Glu
Other: Prisma Colored Pencils, Scor-pal