I am so excited about my new craft room.
I still have a few more things to bring in from my old craftroom but for the most part it's done and I wanted to share it with you!
I have had a craft room for years but it was cramped and dark and cluttered!
So when my daughter moved into an unfurnished apartment last month I let her take all her bedroom furniture and promptly began planning my new room.
I didn't want to repaint so I had to make it work with the colors she had on the walls.
Here's how it looks when you walk in.

I found the material at Hobby Lobby. It matched the paint so I thought it would help tie everything together!
I made the window treatment with a few pieces of wood, some batting, and material.

This is a closer look at the left side of the room. The shelf/desk is from Ikea.
I covered it with material and then with clear vinyl.
I just wrapped the material around the top of the desk panel and stapled it in place.
The white board behind my desk always has my To Do list in the order of what needs to be done for all of my design team projects.I LOVE checking them off and seeing the progress as I complete each one :)
Underneath the desk I put a Helmer Drawer Unit from Ikea. Great storage for a great price!

The drawers are really roomy.
I keep my cut paper for the insides of my cards, my camera's, and my Tim Holtz Craft Sheet in this drawer.

This drawers holds all my chalks and applicators.

I still have a few drawers to fill :)
Above the desk portion is the stuff I like to keep close to me.

The Cupboard on the right has my colored pencils, post it notes, and the plastic envelope that I store all my smaller patterned paper scraps in.
Underneath that is my pen holder that I got years ago from Pampered Chef.
The other container is from the Pluggis 7 pc. Set from Ikea. I am keeping projects in process and my tape gun in there so I can put it away and keep my desk clean when not in use. keep in mind...this is new to me...I'm not really sure that I'll be able to keep this desk clean :)

Underneath the desk I have a couple drawers that hold embellishments, tags, and decorative scissors. The green boxes hold my High Hopes stamps and the plastic containers in the top right section hold my Gina K and Amy R stamps.

Here's the unit that is to my right when I am sitting at the desk (I moved my chair out of the picture). The bottom part is an Expedit shelf turned on it's side. I added two sets of drawers
on the left side. I put a metal organizer on the top. My kid's old
band teacher gave it to me. It was black but my fabulous hubby spray
painted it white so it would match my new room. I love how it turned
out! I found something similar on line if you are looking for something like this.

My Copic markers sit on my right. They are in the Ultimate Pen Storage System. I LOVE this thing! Note: If you are going to stack it this high you need to lean it against the wall like I did or it will tip over!
The white container on top is part of that Pluggis 7 pc. Set. They can be hung up on a rail but I haven't decided if i am going to hang them yet. For now this one holds my glue and my bag of stamped images that I need to color.

The mini drawer unit holds extra blades for my cutter, tombo adhesive, pop dots, and other tapes and adhesives. The jar on top? That's treats for my dog. She likes to come visit and get one when I am stamping.

In the next section of the shelf I house my inks and my white cardstock.

In the purple pencil box I store my Memento Dew Drops.

Continuing right along the shelf....
On the top are all my flowers. The next few shelves hold my eyelets, bling, misc. ink, sponges, stickle, and my eyelet/embossing work area.

The box on the top is a photo storage box. I store different colored flowers in each box. I've used this for a few years and it has worked great!

I store my regular eyelets and brads in this bead container that I picked up at Joann's a few years ago.

And...the stickles and liquid pearls are in this terrific Dazzle Caddy.

Moving to the lower section...let's check out the plastic drawer storage units.
This one is full of Stampendous yummminess!
The top drawer is full of encrusted jewel kits.
The second drawer has my fragments.
The bottom drawer is for my embossing enamels and powders.
I store them upside down so I can easily see the colors. You just have to make sure you remember to close the lids tightly or you'll have embossing powder all over your drawer.
...ask how I know...

Another one of the drawers units holds my Creative Memories Circle/Oval cutters, some misc. embellishments, and my glitters. I keep some of my punches on top of these smaller units.

The last drawers unit holds dew drops, misc. tools, and my acrylic blocks.

I store my dew drops in the Mini Stuftainers from Stampendous.

I use them to store some of my frequently used glitter too!

Here is the other side of my room.
The unit on the left closest to the window was the percussion cabinet from my kids Middle School Band room. The teacher gave it to me when my son made a new one for his Eagle Project.
You can see how ugly it was before in this post.

Next to that is another Expedit shelf turned on it's side. I added four sets of drawers on the top and four door inserts on the bottom.

Here is a peek inside one of the doors. I keep my acrylic paints in plastic containers.

In another door I have containers with punches.

I keep copic refills in a couple of the drawers.

In another drawer I keep my DCWV paper pads.

This is my die cutting/punch area.

I absolutely LOVE how this die magnet board turned out!
I attached 16 magnetic vent covers to the wall with Command strips so that I can easily take them down with out damaging the wall. Then hubby cut the framing for me and I added the frame using Command strips too!
Did I say that I LOVE this?!?

This is what Magnetic vent covers package looks like.
I got them at Home Depot for around $4 per 3 pack.

Here's a top view of my work area.
I covered the top with a thin layer of batting, material and clear vinyl.

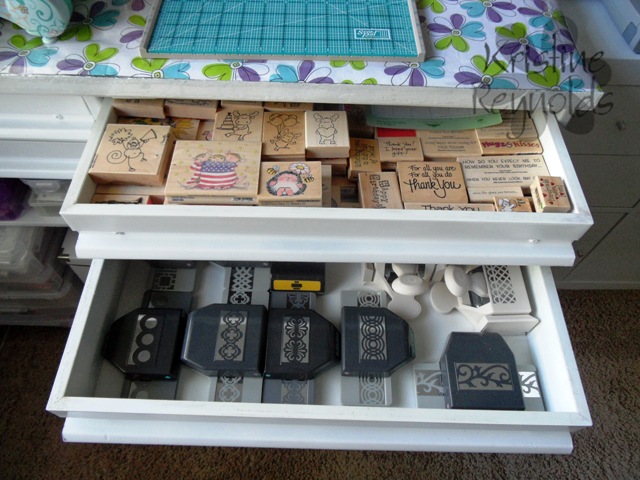
Here's a peek into some of the drawers...
These two hold my small border punches and my Thomas Kinkade stamps.

The two drawers next to those hold my wood mounted stamps and my larger border punches.
I have two Artbins that hold my cricut cartridges and books.
The other two Artbins hold my fancy brads and my jewelry findings.

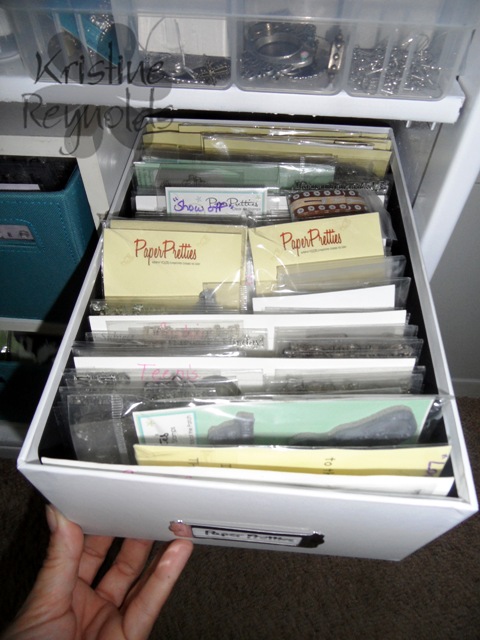
Here's a peek at my brad organization. Love this Artbin container for this purpose!

I keep my 12 x 12 papers in the purple bin.
I don't have any one set way of storing my stamps.
I store my Rubber Cafe stamps in the clear bins underneath that bin.

I store some more of my 6 x 6 papers and some more stamps in the white boxes.
I found the teal bins at Target and they matched my room so I had to get them!
I store my Stampendous Jumbo stamps in the big bin on the bottom.

I store my clear stamps in the smaller bins.

The final thing I have to show you is my big 'ole jar of buttons.
I bought it at Michael's and seriously thought that my buttons would nearly fill it....clearly I need more buttons, right?!?

I hope you've enjoyed the tour of my room and that it inspired you to create an awesome space for yourself!
Kristine
3 comments:
WOW! Fantastic! Love all the storage ideas you have too. Enjoy your new room.
Lynn
What a fantastic craft room, so organised and inspirational.
Your storage ideas have given me food for thought............thanks for sharing your ideas.
I hope that you continue to enjoy your new room and make some "knockout creations".
Thanks for letting us "visit" your room,
Heather (UK)
All I can say is WOW....WOW....WOWza
Post a Comment