Hello Rubber Cafe' Fans!
Here they are!!!
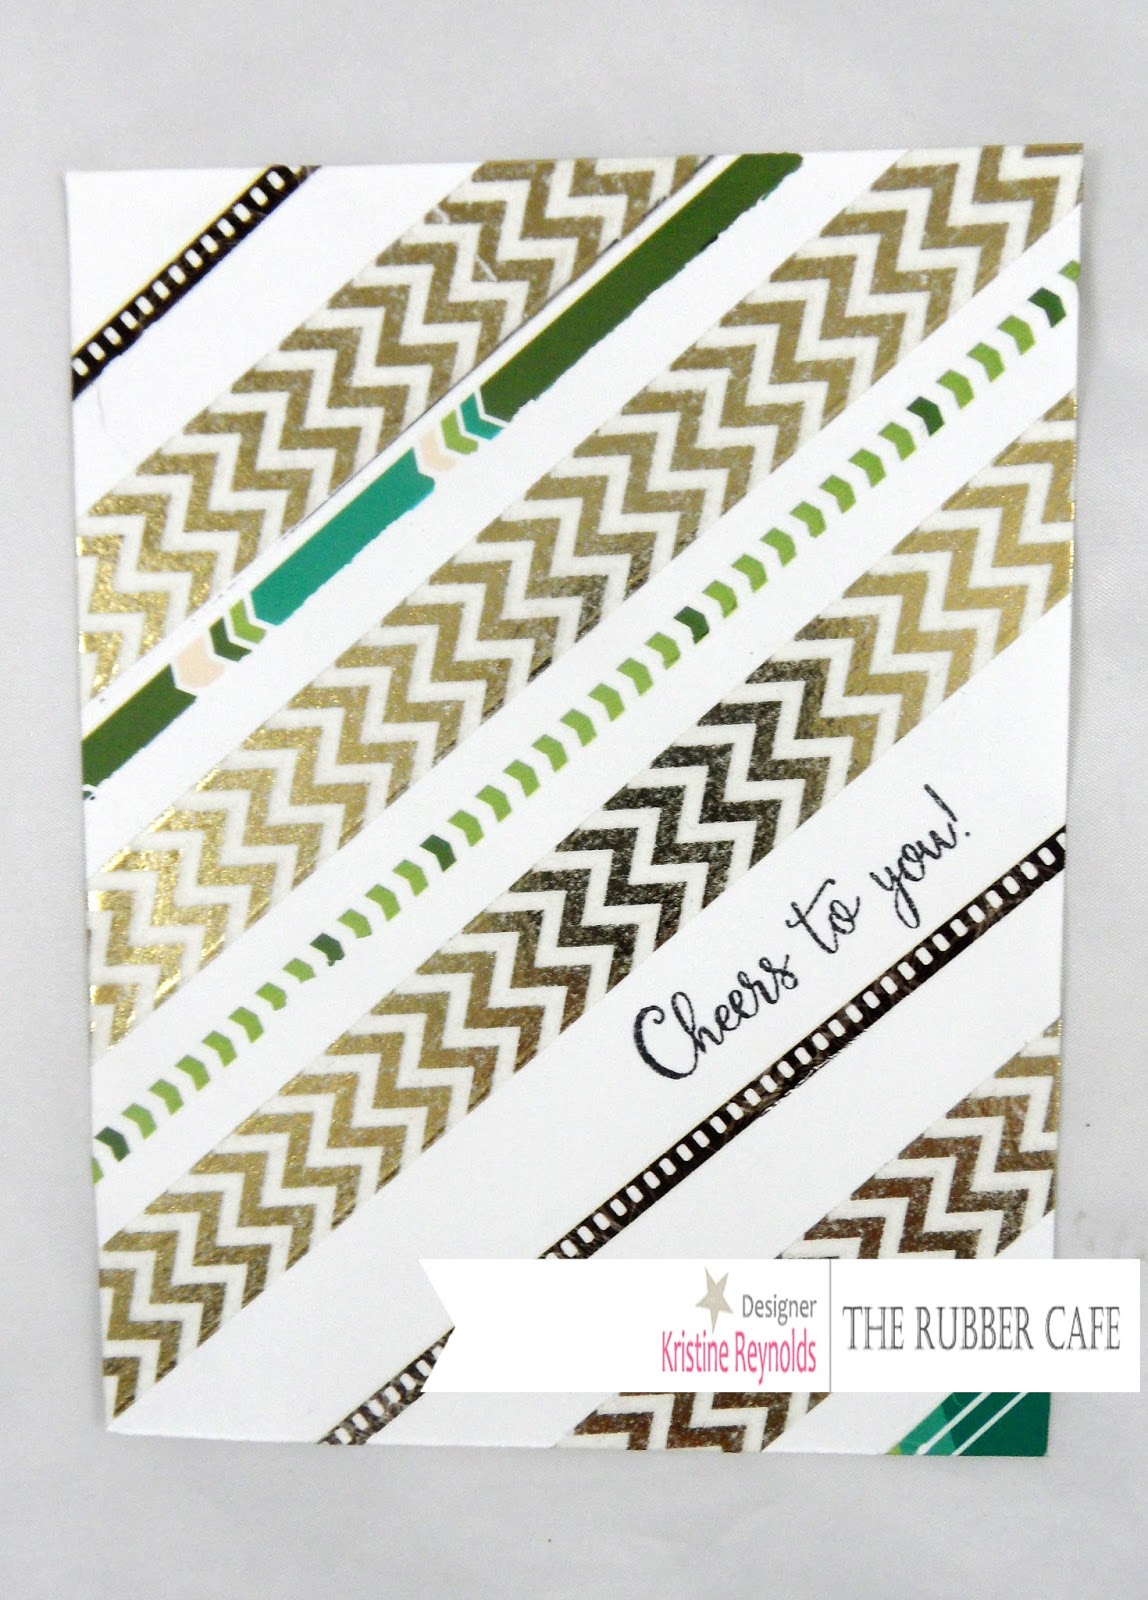
That amazing gold chevron Washi Tape on both of the cards comes with this month's Creative Cafe' Card Kit, I thought it would be fun to share some great ways to incorporate washi tape on your projects.
For the "Cheers" card I started by adhering a strip of Queen & Co. Washi Tape diagonally across a 4" x 5 1/4" white panel of cardstock. Then I added one of the stips of Rub on stickers from the kit above the washie and I stamped the sentiment below the washi tape with Memento Tuxedo Black dye ink.
I continued to alternate washi tape and rub-on strips until the panel looked like this.
I adhered the panel to a 4 1/8" x 5 3/8" piec of green patterned paper with
Scrap Happy Glue and then adhered it to a beige card base that measures 4 1/4" x 5 1/2".
The final step is to stamp the beer glass on a white scrap and color with colored pencils.
Then cut it out and adhere to the card with a 3D foam square.
For the other card I started with a 4" x 5 1/4" panel of white cardstock and added the strips of Washi Tape.
I stamped the sentiments and lips with colored ink that I had in my stash.
Then I stamped the leprechaun on a white die cut oval panel and colored it with colored pencils.
I backed the oval with a yellow die cut panel and then a green scallop edge oval and adhered it to the card with
Scrap Happy Glue.
I hope this post gave you some fun ideas to try with your washi tape.
I just love how these turned out!
Supplies:
Stamps: The Rubber Cafe'- , Feeling Lucky
Ink/Color: Black Tuxedo Memento ink, Lipstick and LIme Clearsnap chalk ink
Embellishments: Queen & Co. Washi Tape, Bo Bunny rub-on stickersTools:Spellbinder classic oval and scallop oval diies.