Showing posts with label stencils. Show all posts

Wednesday, September 13, 2017

Give Thanks

Happy Hump Day!

I am sharing another Stampendous fall stencil card today.


I stenciled the Cornucopia Stencil with regular embossing paste.
After it dried I replaced the stencil and then sponged on Tsukineko Splendor Ink on the image to color it.


There are so many fun stencils available from Stampendous and they are a blast to experiment with too! 


I hope you enjoyed today's card.

Thanks for stopping by!

Kristine

Monday, September 11, 2017

Fall Thanks


You wouldn't know it if you walked outside lately as the temperatures still feel like summertime but I can tell by the calendar that fall will still be here!

Today's card is a tribute to fall in hopes that it will soon be here!

I used the Large Oak Leaves Metal Stencil  and the Small Thanks Metal Stencil from Stampendous.


I used the Metallic FX Mica Powders to get this cool look!


I hope you enjoyed today's inspiration!

Thanks for stopping by!

Kristine

Wednesday, August 30, 2017

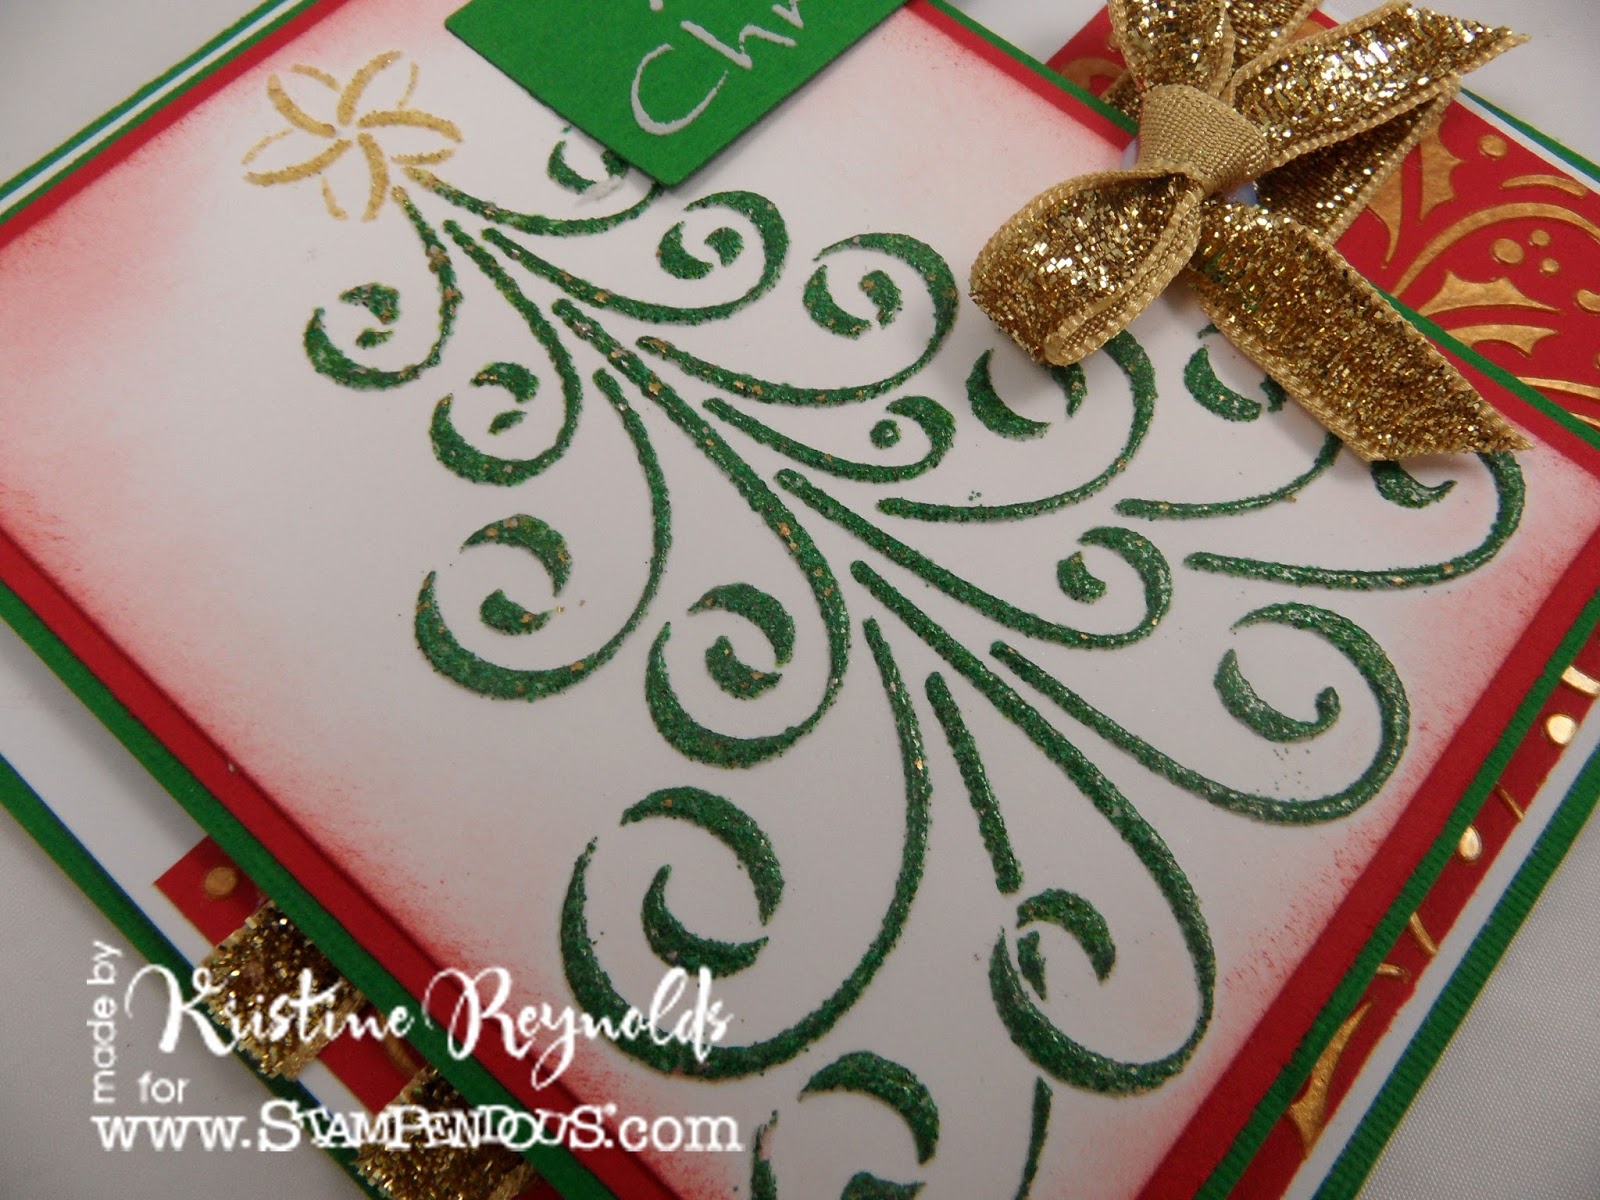
Curly Christmas Tree


The Stampendous Team are sharing their Tree projects all week long.

Today I am sharing another stenciled tree project that is perfect for Christmas.


I stenciled the tree on white cardstock with regular embossing paste and then covered the wet paste with micro glitter.


The background was created by stenciling the Holly Scroll Metal Stencil on red cardstock with Copper embossing paste.

The sentiment is Merry Christmas.


Thanks so much for stopping by!

Kristine

Monday, August 28, 2017

One Tree...Two Ways...


This week the Stampendous ladies are sharing our tree creations.

Stampendous has a wide array of stamps and stencils featuring trees!

Today I am sharing two cards that I made with the Tree of Life meal stencil.

For this first card I applied various distress inks directly to a panel of cardstock to create a pretty background.  When it dried I stenciled the Tree of Life over the top of the panel with glossy black embossing paste.


For the second card I also used the Tree of Life meal stencil but the card looks totally different!

I created the background by laying the Large Scales metal stencil on top of a white panel of cardstock and sponging distress ink over the top of it.a

Then I stenciled the Tree of Life over the top of the background with regular embossing paste.


After the paste dried I lay the stencil back over the tree and then sponged ink over the top to color the image.

More inspiration and links to other tree projects can be found on 

Thanks for stopping by!

Krisine

Thursday, June 29, 2017

A Stencil Sneak Peek

Lot's of new great Stencils are being released by Stampendous in the July Catalog!

Today I am sneak peeking two of them.  I kept the design simple to showcase the stencils.

The first one is a fun Halloween Stencil called Broom Flight.

I stenciled it with Glossy Black embossing paste.


The sentiment is from the new sentiment set called Spooky Wishes.


The second stencil I'm sharing today is called Snowman Peeking.


This sentiment is from the new Snowman Trio cling/die set.

I stenciled it with regular embossing paste and then after it dried I sponged Spendor ink on the dried paste to color the image.


I hope you enjoyed my sneak peek.
Hop over to the Stampendous blog to check out lots of sneak peeks from the whole week!

Thanks for stopping by!

Kristine

Thursday, May 18, 2017

Jellyfish

The Stampendous Design Team is celebrating all the creatures "Under the Sea" this week!

Today I am sharing a beautiful card that I made with the Jellyfish stencil.


To create the background I added drops of Red Violet, Ultramarine Blue, and Opaque white Deco Art Acrylic paint to a Creative Palette. Then I lay a panel of white cardstock over the palette and pressed the backside.


Once dry, I stenciled the jellyfish over the top with Pearlescent Embossing Paste.

While the paste was still wet I sprinkled Crystal Micro Glitter over the top to add a little sparkle.


Check out more inspiration on these blogs:

Stampendous Blog

Jamie MartinLouise Healy


Thanks for stopping by!

Kristine

Monday, May 1, 2017

Best Wishes

Mother's Day is coming soon and Stampendous has tons or great stamps and dies that are perfect for your Mother's Day cards.

Today I am sharing a card that I made using Best Wishes Ensemble stencil.


I stenciled the sentiment with regular embossing paste and let it dry.
When dry I replaced the stencil and then sponged ink on to it to color the image.


I used May Arts Ribbon.


The Stampendous team will be sharing Mother's Day inspiration all week!
check out the inspiration on the Stampendous Blog.

Thanks for stopping by!

Kristine

Monday, March 6, 2017

Cupcake Tiers

It's birthday celebration time this week.
The Stampendous team will be sharing lot's of cool birthday inspired creations with you all week long.

My first share is this fun card featuring Cupcake Tiers.


I colored the image with Prisma colored pencils and blended with gamsol and blending stumps.
The patterned paper was created by stenciling the leopard skin metal stencil on dark pink cardstock with regular embossing paste and then sponging pink ink on the dried pattern.


I am pretty happy with the way this card turned out!

This image is perfect for any birthday celebration!


Chcck out more amazing birthday inspiration starting on 

Thanks for stopping by

Kristine


Tuesday, February 28, 2017

Trout and Friends

Sharing another stencil creation card today.

Trout and Friends is the perfect stencil for fisherman or woman in your life.


I stenciled the design with regular embossing paste and let it dry.

Then I put the stencil back over the dry design and added ink to color it.


You can find the link to the project sheet HERE.


There is more inspiration and links to more projects on the Stampendous Blog.

Thanks for stopping by!

Kristine

Monday, February 27, 2017

Hello

The Stampendous Team wil be sharing lots of awesome stencil projects all week long!

Today I am sharing a card that uses three stencils.


I had some fun with the boot stencil.
After I traced the stencil on white cardstock, I had a little doodling fun.
Then I colored the boot with copic markers.


I stenciled the Houndstooth Stencil on brown cardstock with black embossing paste.
I did the same with the Hello Stencil.


More stencil inspiration and links to more projects can be found on the Stampendous Bllog.

Thanks for stopping by!

Kristine

Wednesday, January 18, 2017

Tall Poppy

Today I am sharing a tall skinny card that I made just to mix it up a little!

I stenciled the Tall Poppy Stencil on a white panel with Regular Embossing paste.  When the paste dried I replaced the stencil over the image and sponged ink on the image.  Then I cut the tall poppy into 3 2" squares.


The card base was created by folding a 8" x 8 1/2" panel of orange cardstock in half.

Then I adhered a yellow strip of cardstock on the left side of the card.
I punched a strip of green cardstock and then added it to the card.

I backed each of the stenciled panels with orange and green cardstock and then added them to the card.

The final touch was the yellow ribbon.


Stampendous
DWLL3023 Tall Poppy Metal Stencil
MPW811 Mixed Media White Paper
DWDPK Dreamweaver Palette Knife
DWKM2010 Paste Spreader
DWDEP2010 Dreamweaver Regular Embossing Paste 
 
Plus:
Orange, green and yellow cardstock
EK Success Border Punch
Creative Impressions Ribbon
Splendor Ink by Tsukineko
Zip Dry™ Paper Glue by Beacon Adhesives


Thanks for stopping by!

Kristine

Thursday, December 8, 2016

Thank You

I made another cute card today using Winter Friends stamps and matching dies from Stampendous.


I created the background with the Holly Scroll Stencil and gold embossing paste

I colored the image with Prisma colored pencils and blended with gamsol and blending stumps.

The ribbon is May Arts.


I just love the little 3D arms!

I made a thank you card using a sentiment from the Friendly Phrases perfectly clear stamp set.

I know I will need some Thank You cards after Christmas so now I have one!


Thanks for stopping by!

Kristine

Tuesday, December 6, 2016

Winter Penguin

This week at Stampendous Stamps we are featuring Wonderful Winter Friends.
These jumbo stamps and matching dies are so fun!

They have all kinds of pieces that mix and match for lots of fun combinations.


Hopefully this picture shows the cool layering that you can do with the different pieces.


The background of this card was created with Snowflake Cascade stencil and regular embossing paste.


I hope you enjoyed my card today.
More inspiration and information HERE.

Thanks for stopping by!

Kristine

Friday, November 25, 2016

Snug Bird

I hope you had a wonderful Thanksgiving with your friends and family.
I had a double fun day as it was my birthday and Thanksgiving!

And now...the Christmas Countdown starts!

25 days till Christmas so I am sneaking in a Christmas card whenever I can.


This card was made with the Stencil Duo set, 
I traced the stencil with the black pen that comes with the set.
I added the dots and then I colored it with Prisma Color pencil and blended with gamsol.


The paper is from a fun Christmas pad by The Paper Studio from Hobby Lobby.

The sentiment is from the 'Tis the Season perfectly clear stamp set.


Check out more inspiration!

Alison Heikkila (Thursday)
Thanks for stopping by!
Kristine

Monday, November 21, 2016

Doodling Duos

Happy Monday!

I hope you had a great weekend!  I had a nice one and found a little but of crafting time.

The Stampendous Team are playing with Fran's stencils Duo's all week long.

Today I have a Christmas card that I made using the 


I traced the poinsettia onto white cardstock using the stencil and then I colored it with Prisma colored pencil and blended with gamsol and blending stumps.

Then I fussy cut out the flower and added it to my card with pop dots.


The patterned paper is by The Paper Studio from Hobby Lobby,

The sentiment is from the Tis the season perfectly clear stamp set.


More info and inspiration can be found HERE.

Thanks for stopping by!

Kristine
Thursday, September 15, 2016

Airbrushed Stencils


The Stampendous team was given some wonderful paper crafting tools to play with and this week we are sharing our creations all this week!

This was a fun, simple card that I made using the Tall Daisies Stencil.


For my card today I used:


Look at those amazing layers!
I used the Mini Perfect Layers to create the black 1/16" layers.

To create the main image I stenciled the tall daisies with glossy black embossing and allowed to dry.
Then I used the Perfect Airbrush to spray copic ink across the paper.
When dry I stamped the sentiment with black memento ink.

Finally all those amazing layers were cut using the Mini Perfect Layers.


And...as you know when we hop there are prizes....


There will be 3 prize packages available during our hop! Each winner will have the chance to win one of the following prize package, a Perfect Rulerand Pop-Up Die Set combo package, a Mini-Perfect LayersL and Pop’cessories Die Set combo package or a Perfect Airbrush, 1 – Holly Pattern Stencil and 1 –Holly Scroll Stencil combo package. US winners only, see Official Contest Rules for details.

Check out more great inspiration on these blogs:


Kristine Reynolds (That's ME!!!)